


Pavako RC Engineering

© 2015 P. van Kooten
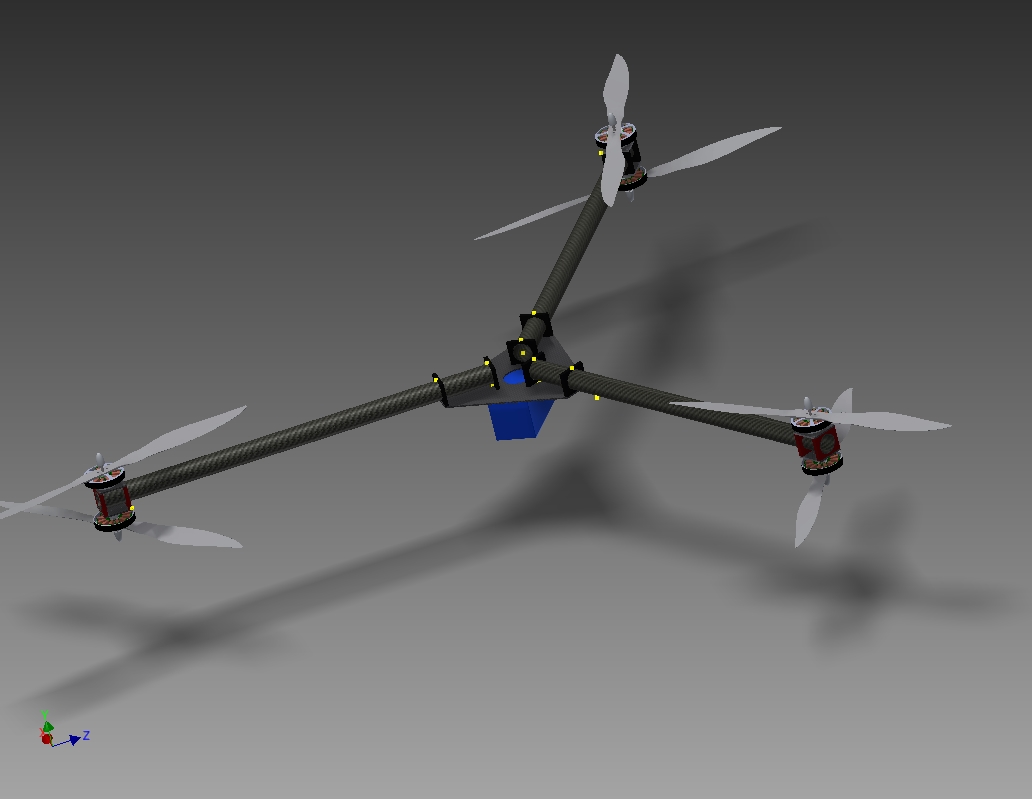
Y6 Copter Design & Components
One of the first design-sketches
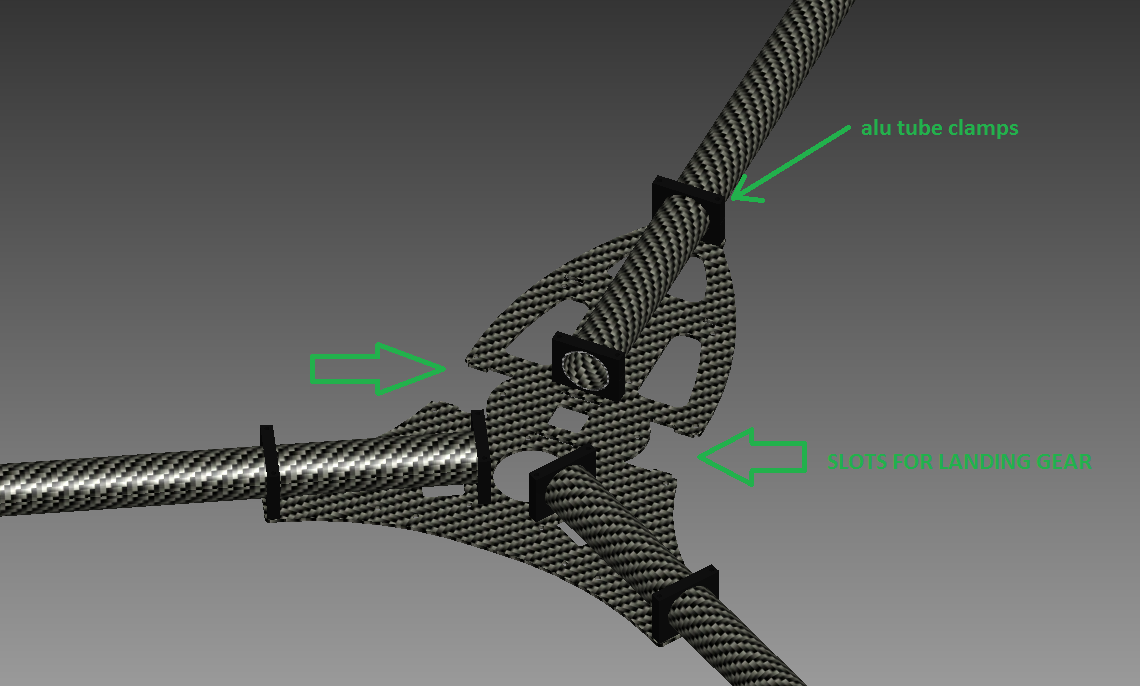
Bottom-plate with carbon booms and alu clamps
Landing gear construction
The landing gear booms are locked-up between two carbon pieces seperated by tube clamps. Both pieces are interlocked with the bottom plate using slots. Refer to picture below
The landing skids are made out of 16mm carbon tubes. The T-section is a part that I bought from Tarrot. It converts a 25mm tube diameter into a 16mm tube diameter. The front-end and rear-end is covered using rubber dampers.
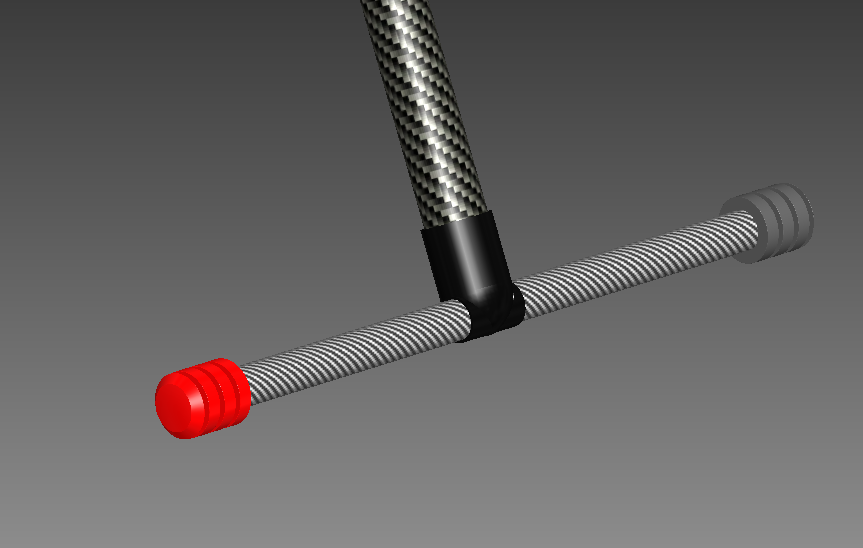
Landing skids with rubber dampers
The "top-plate" is screwed onto the alu tube clamps and will hold the speedcontrollers for the three motors on the top side of the drone. The bottom plate will hold the three ESC (speedcontrollers) for the three motors on the bottom-side of the drone. On key-positions alu-stand-offs are placed. The "top plate" is also the base for the PMU (Naza Power Management Unit) and the GPS holder.
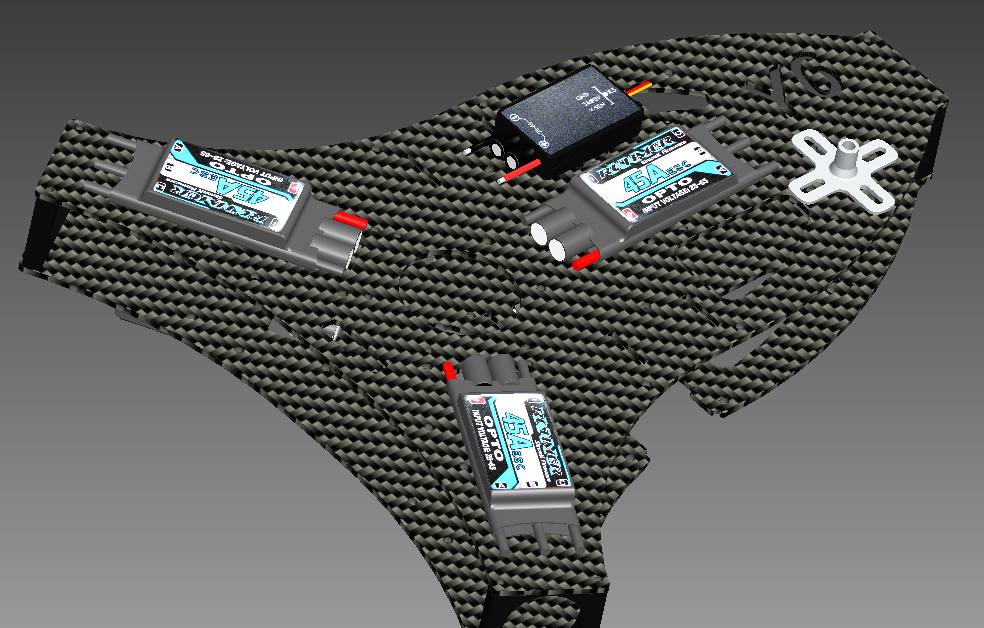
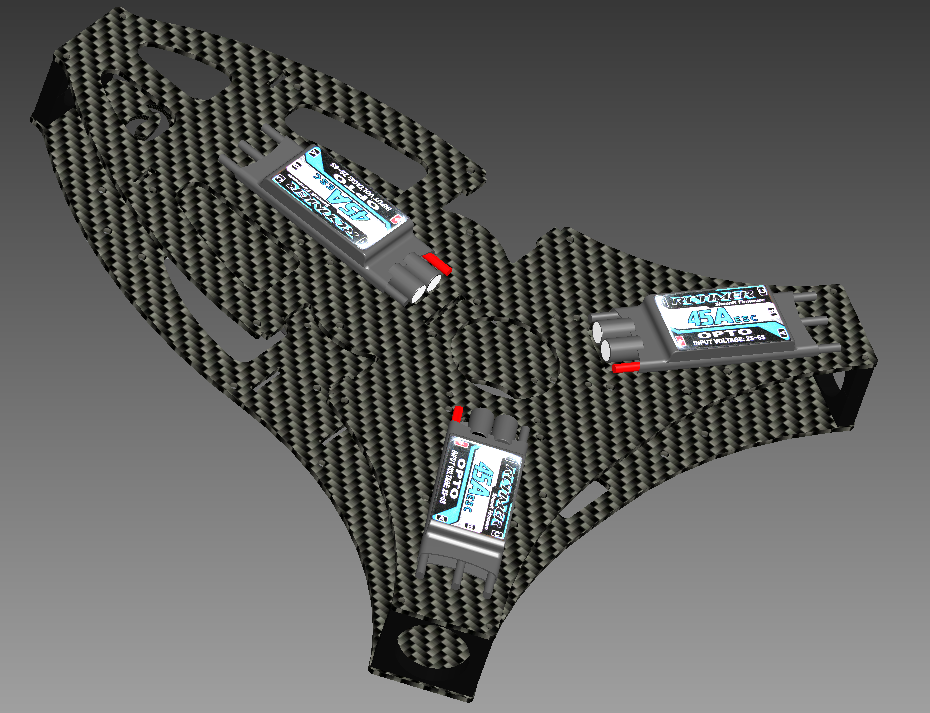
3x ESC, PMU and GPS holder 3x ESC Bottom-plate
Alu stand-offs 28mm height between top and bottom plate
On top of the top-plate a Power Distribution Board is screwed. This PCB board will interconnect all ESC's connections. All positive leads are connected together and all negative leads are connected together. It is also connected to the main battery and PMU.
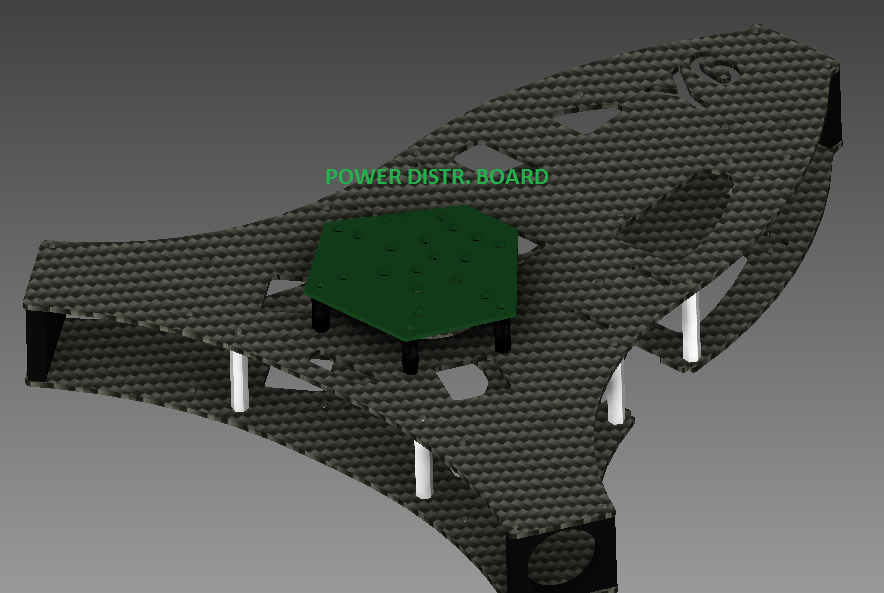
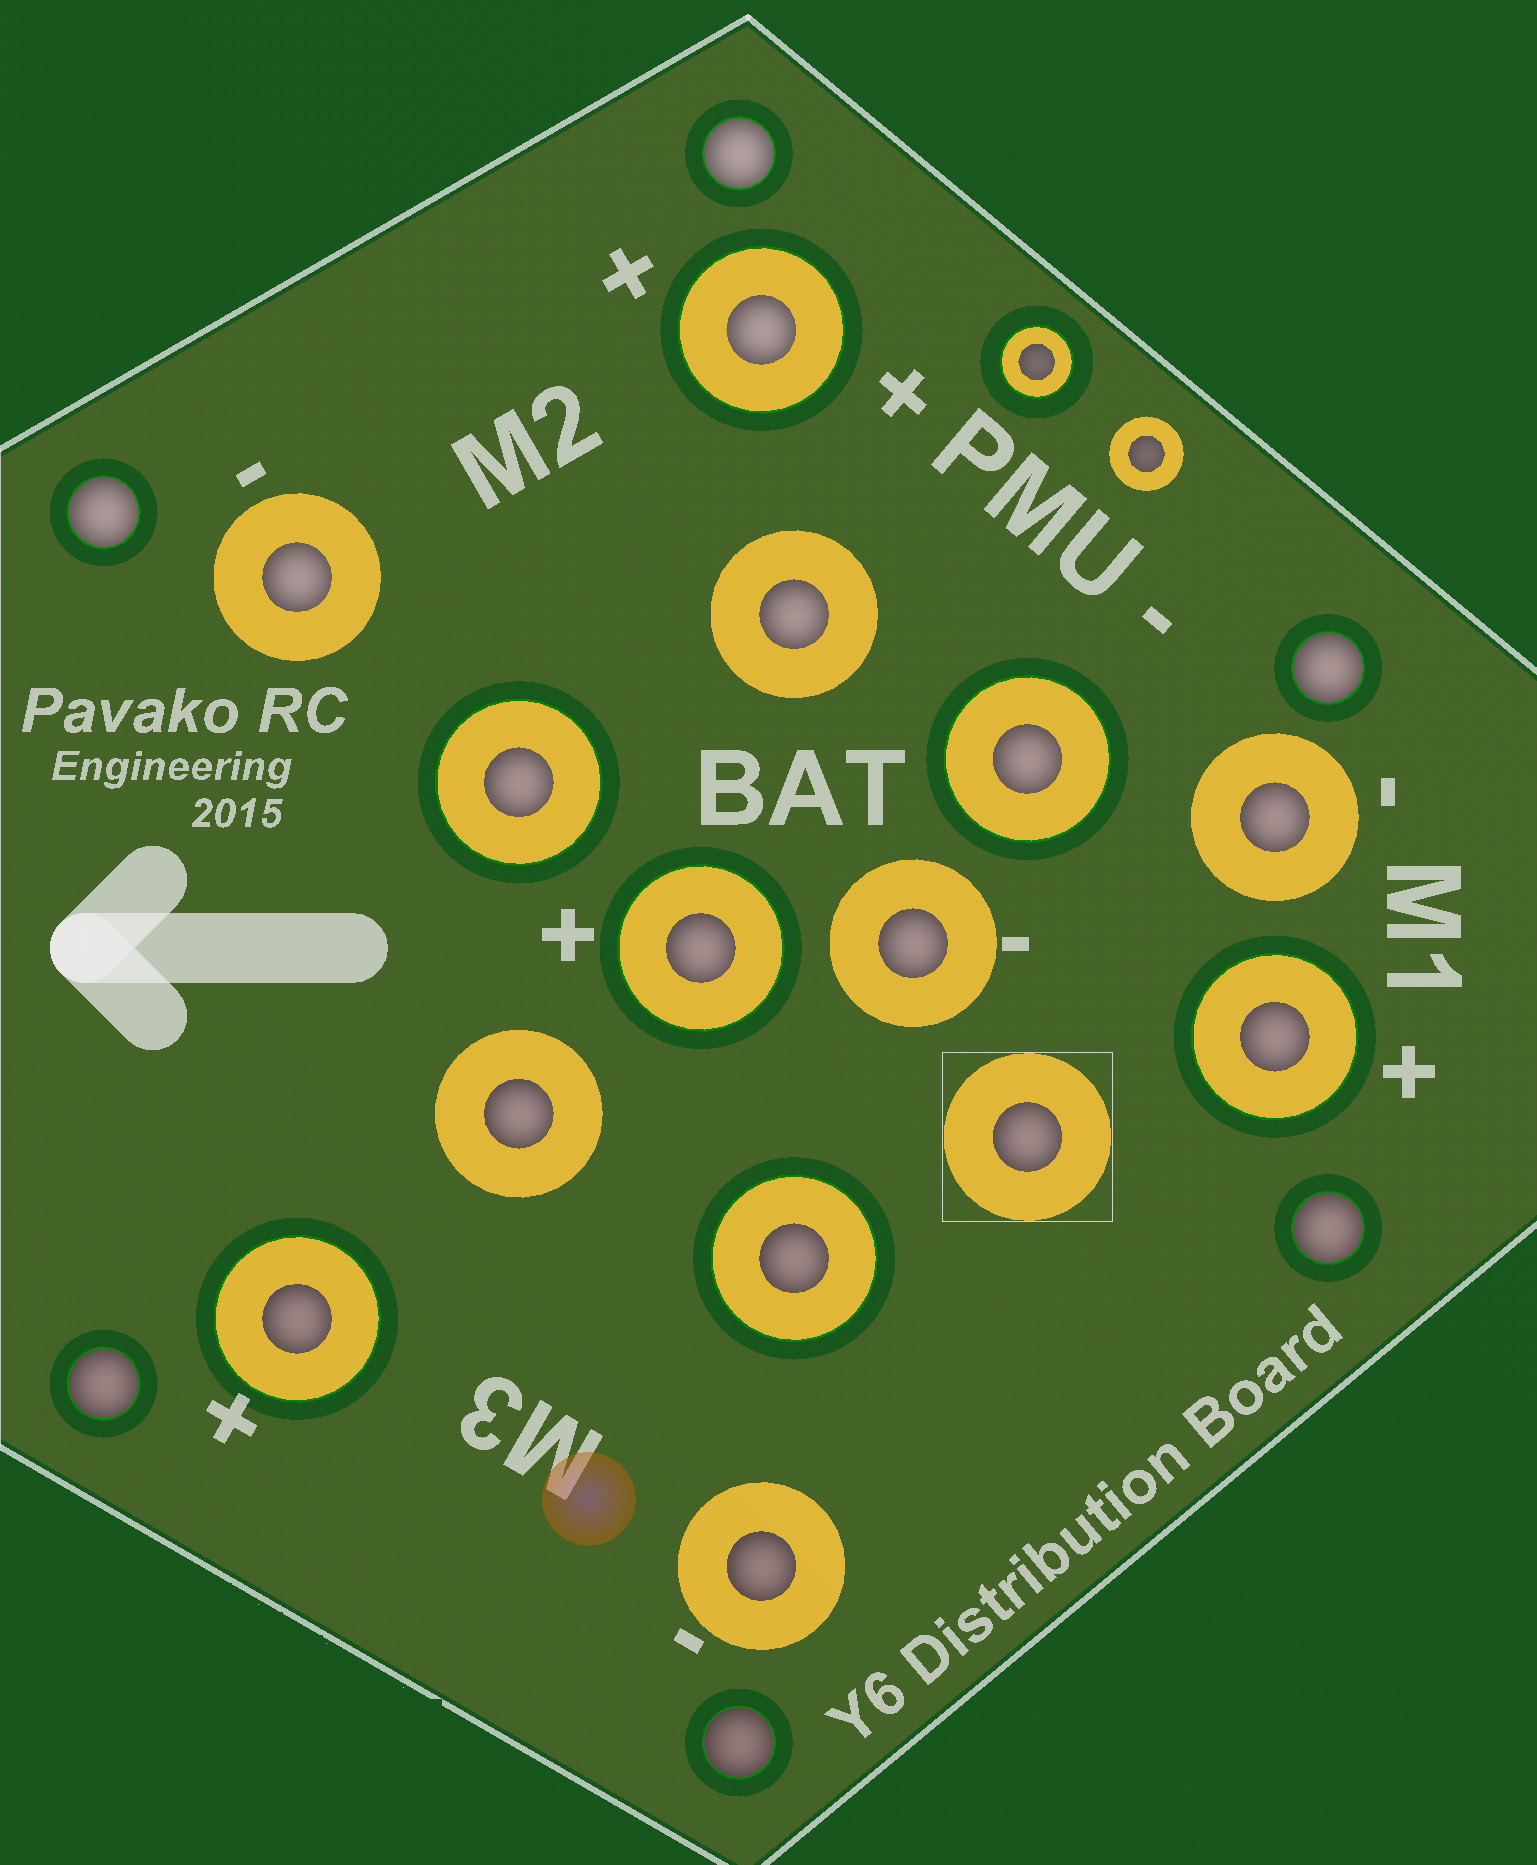
The Power Distribution Board connects all positive leads on the ESC's and all negative leads of the ESC's. It also interconnects to the battery and PMU.

Power Distribution Board (left) Example used in test setup (3xESC+PMU+BATTERY leads )
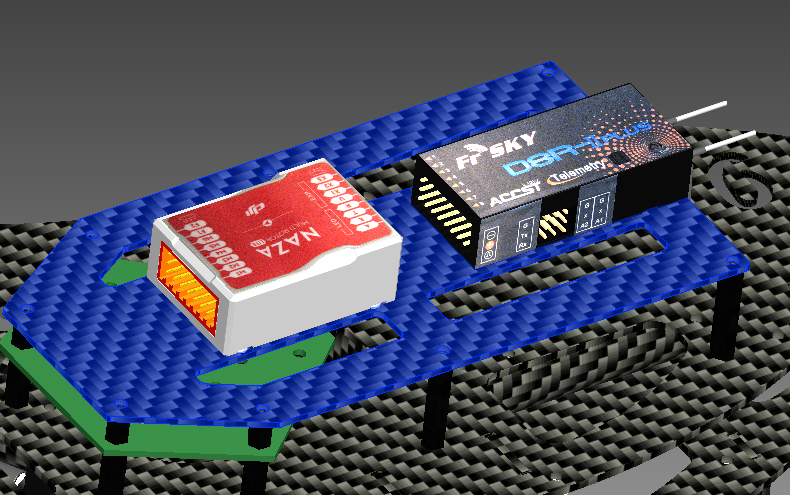
The Flightcontroller and receiver are mounted on another level above the Power Distribution Board.
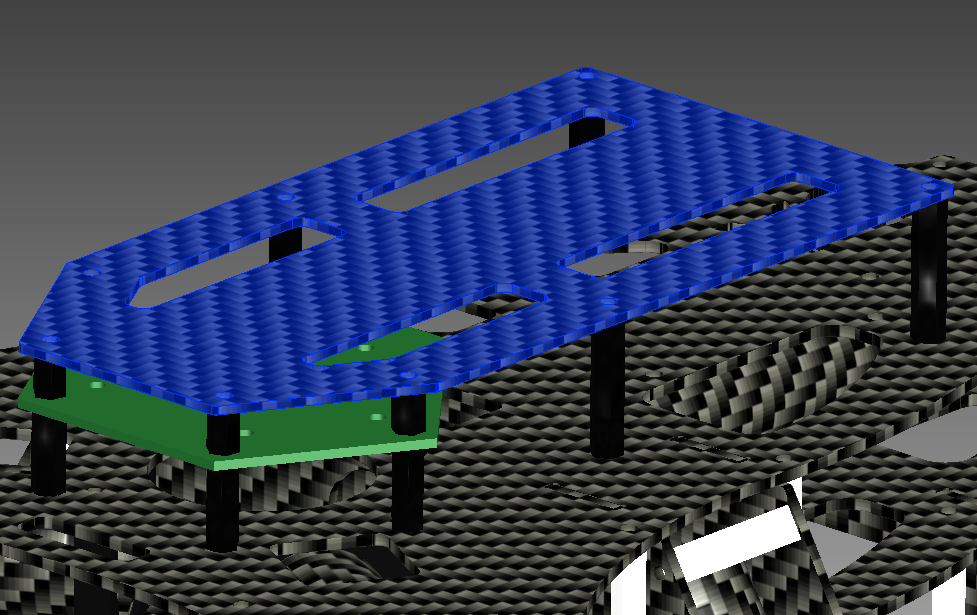
Elevated carrier board for Flight Controller and Receiver
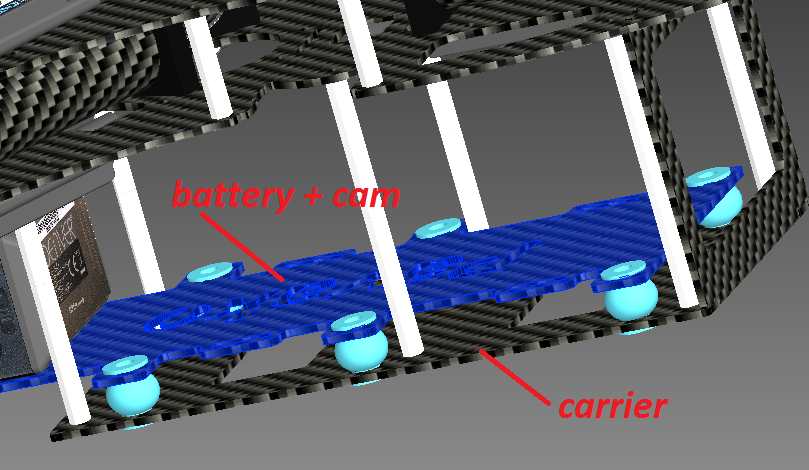
The lithium polymer battery will be installed on top of a so called carrier plate. This plate is directly connected to the frame. The battery plate will also carry a HD camera. To reduce noise in the video capturing due to vibration of the frame, 6 vibration damping balls are installed between the two plates. Refer to picture below :
Inspired by the tri-copter of David Windestål (see rcexplorer.se) I started some sketches early this year to create a Y6 copter. Instead of the tri-copter the Y6 Copter has on each arm two counter rotating propellors. The tilt mechanism on the tail boom (arm) is not required anymore. Also I wanted to make a larger platform to be able to carry more stuff. For a drone a flight controller is required to be able to adjust each motor individually and very fast at the same time.
Many (online) shops sell all kind of drones these days. So what's deal ? Just buying is no option for me. First you spend heaps of money (when you want something reliable). Second when something is wrong or not functioning anymore it's hard where to start looking. Designing your own drone gives also a bit more insight in all kind of things. An insight can manifest itself suddenly, such as understanding how to solve a difficult problem. The last one is especially important in mechanical design. How to design the different parts to be able to assemble them easily ? With no doubt this can be improved, but this is only a proto design ; so-called engineering sample....
Many (online) shops sell all kind of drones these days. So what's deal ? Just buying is no option for me. First you spend heaps of money (when you want something reliable). Second when something is wrong or not functioning anymore it's hard where to start looking. Designing your own drone gives also a bit more insight in all kind of things. An insight can manifest itself suddenly, such as understanding how to solve a difficult problem. The last one is especially important in mechanical design. How to design the different parts to be able to assemble them easily ? With no doubt this can be improved, but this is only a proto design ; so-called engineering sample....
During the design phase I made a few sketches to be able to see if all electronic components can be fitted. After some research I decided to use a DJI flightcontroller. As I did not want to spend too much money I have chosen the Multirotor Lite autopilot system with GPS functionality. I understood that this Lite version is actually the same hardware as the V2 variant, however it can be upgraded later. Refer to following website for more details http://naza-upgrade.com/ That is something for a later phase when required of course. A summary of the keycomponents of the Y6 Copter is shown below.
=> 1x Naza Multi Rotor Lite (with GPS)
=> 6x RCTIMER 5010-360KV
=> 6x RCtimer 45A ESC OPTO
=> 1x Multistar 5200 mAh 6s 22.2V Lithium Polymer battery
=> 1x FrSky D8R-II PLUS 2.4Ghz 8CH Receiver with Telemetery
=> 1x Denver wifi CAM FullHD 1080p
=> 6x 17x5,5" carbon fiber propellors (3x CCW, 3x CW)
Some other features are :
=> non-retractable landing gear (nice to have)
=> no camera gimbal (I am not an aerial photographer or filmer)
=> custom design of all frame parts
=> full carbon fiber frame
=> dimensions (center-center propellors) : 85 cm
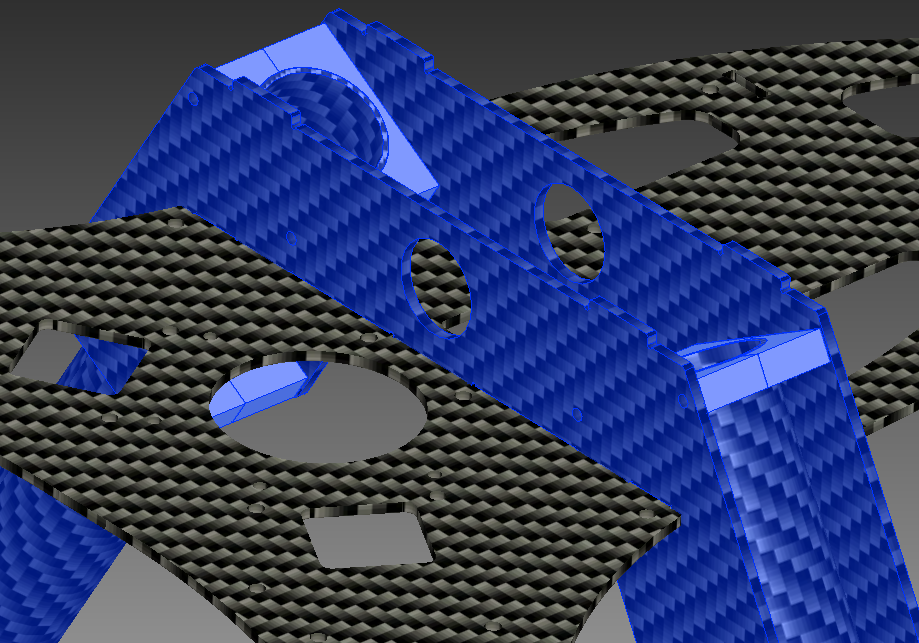
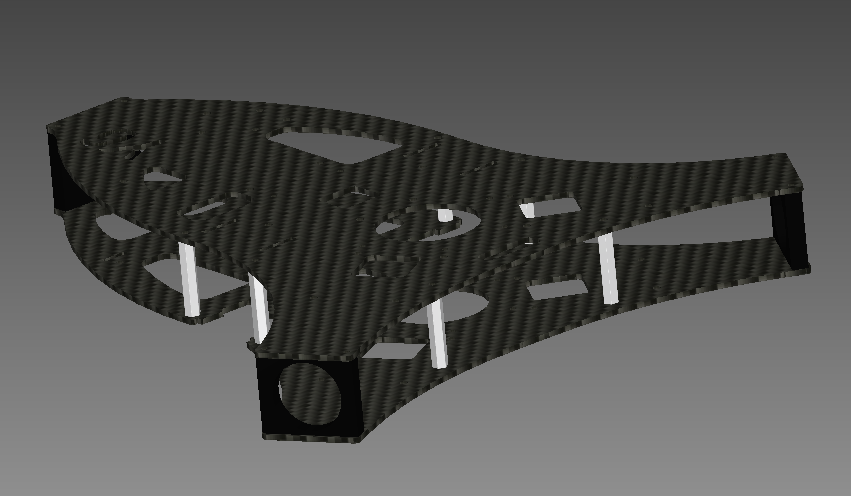
I designed the Y6 Copter in a 3D CAD program in order to validate for each part the dimensions and the interconnection to other parts. As such I could see how the final assembly should take place and also whether the individual parts interfere with each other. The design started with the so called "bottom plate" on which the three carbon arms are mounted. This "bottom plate" also contains two large slots for the non-retratable landing gear. Refer to the different design pictures below.
To align the different components onto the frame I decided to make all components digital, to allow for further processing during the design phase. As I might use these components for other designs it is always handy to have them in a digital format. Since a few parts could be found on the website https://grabcad.com I saved some time to make the right parts. Below an overview of the parts I am using for this Y6 Copter. The left side is a real photo, the right side is the cad part.
SPEEDCONTROLLER RCTIMER SIMON K FIRMWARE PREFLASHED 45A ESC OPTO
SPEEDCONTROLLER RCTIMER SIMON K FIRMWARE PREFLASHED 45A ESC OPTO
DJI NAZA LITE FLIGHT CONTROLLER
DJI PMU
DJI LED MODULE
FRSKY RECEIVER D8R-II plus
GPS mount and module
Brushless Motor
The brushless motor, a RCtimer 5010 type can be downloaded from grabcad. A lot of RC components are available. Some of them are step files, other parts are autocad sources files that can be edited straight away in any kind of cad program.
HD camera Denver AC-5000W
As I could not find the Denver action camera AC-5000W in a digital format, I created it. This camera is a go-pro like camera having nearly the same enclosure to that of a Go-pro.
Other parts
The other parts required are tube clamps and carbon tubes. Those I also created to get a good overview of the assembly later on. Since this is a prototype some parts can be improved or re-designed in a later phase.
Material choice
As I did not had experiance with carbon fiber material to be used as base material i decided to give it a go. Carbon material will add less weight to the total construction and it is also very strong. Besides that it looks quite good. Basically two types are available that are commonly used : Glossy & Twill and Glossy and Plain. An example can be see in the picture below.
|
|
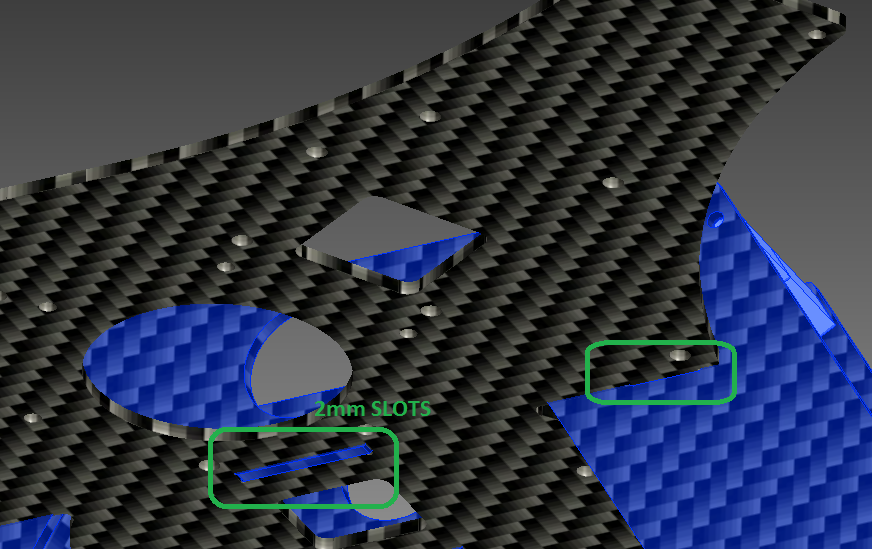
The glossy and plain weave structure on the right side I picked for this design. I believe there is not much difference in them from a strongness point of view. The thickness of all parts is 2mm. From manufacturing perspective usually parts are cut out of a larger size carbon sheet. Commonly used size is 500x400mm. Refer to the manufacturing page here. Therefore I had to fit all parts onto one single sheet. Below an example of all parts.
Some parts are interlocked using slots. The dimensions of those slots are very important to make sure there is not much room for play. It must be a tied fit. The slots are in the red circles in the picture above. On the manufacturing page you'll find more details about the whole process and finally the building page will briefly explain the way how it's been assembled.
Propellors
The propellors used for this Y6 drone are 17x5,5" from RCtimer. They are made out of carbon fiber. Propellors were selected using the table that is below.
Propellors
The propellors used for this Y6 drone are 17x5,5" from RCtimer. They are made out of carbon fiber. Propellors were selected using the table that is below.
|
|
The combination with 22.2V and this propellor should give sufficient pull. Please note this is for one motor.
|
|
Lithium Polymer Battery
The battery will be a 5200 mAh 6s 22.2V Lithium Polymer pack from Turnigy (Multistar). As I have no idea what the flight time will be I just selected this battery, cause I can still charge it with my Flitezone charger that goes up to 6A. Later I'll probably do some calculations, because in this stage of the design I do not no yet what the weight of the y6 will be. It is always a bit of tuning between weight, efficiency of the motors in combination with the propellors and the current that can be delivered by the battery pack.
The battery will be a 5200 mAh 6s 22.2V Lithium Polymer pack from Turnigy (Multistar). As I have no idea what the flight time will be I just selected this battery, cause I can still charge it with my Flitezone charger that goes up to 6A. Later I'll probably do some calculations, because in this stage of the design I do not no yet what the weight of the y6 will be. It is always a bit of tuning between weight, efficiency of the motors in combination with the propellors and the current that can be delivered by the battery pack.
|
|